
In this article, we’ll walk you through ACES management in Nucoda including how to set up your project, export settings, and workflows.
Setting up an ACES project
- Select ACES as the color space
- Select the required version of ACES (note: be careful here to select a version of ACES which is compatible and supported by the rest of your workflow
- Select ACES CC or CCT as the working color space
- ACES CC gives a control feel like that of log video grading
- ACES CCT gives a control feel similar to that of Cineon film log grading
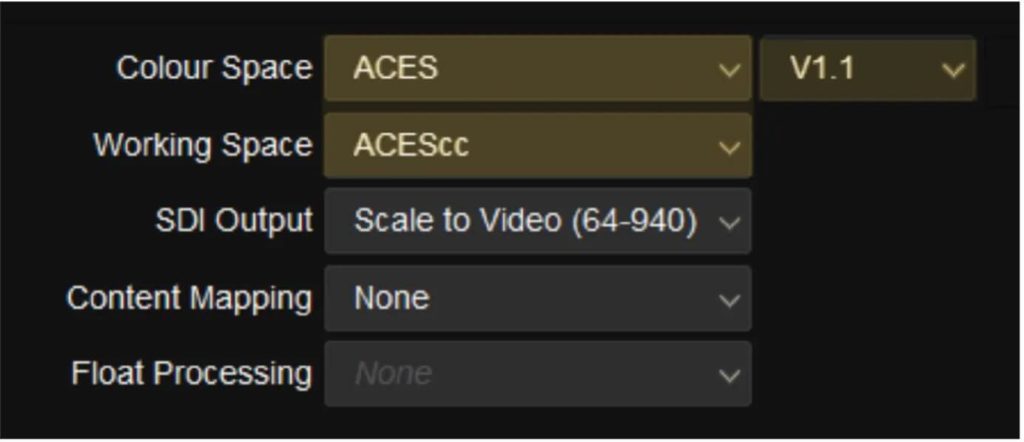
Half Float has been selected by Nucoda (note: ACES uses half float files, this is normal)
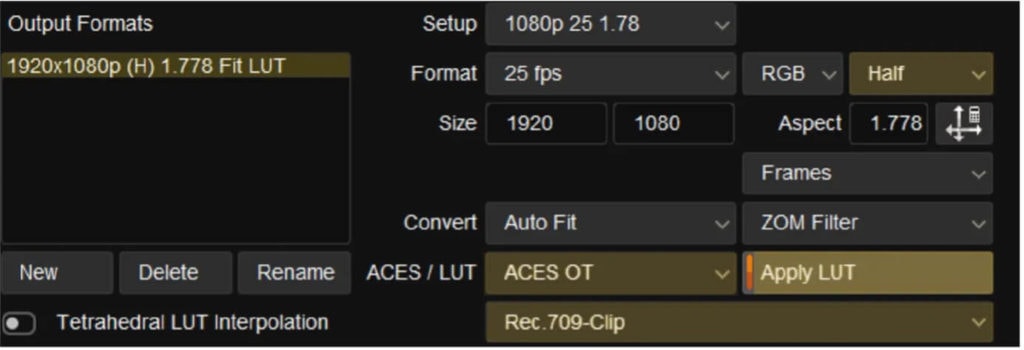
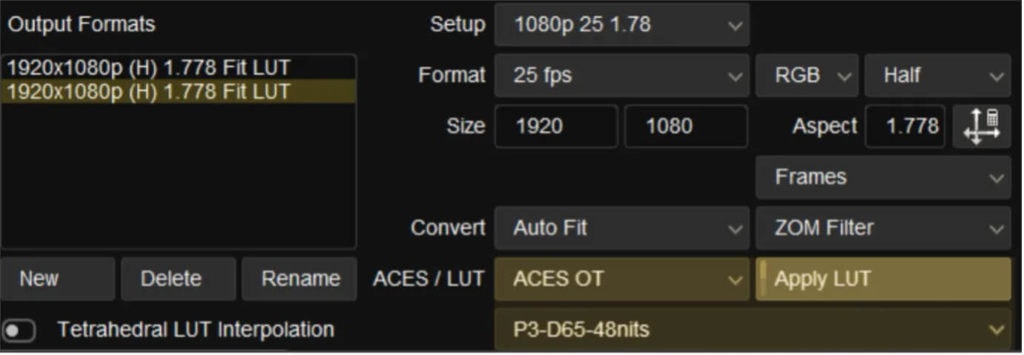
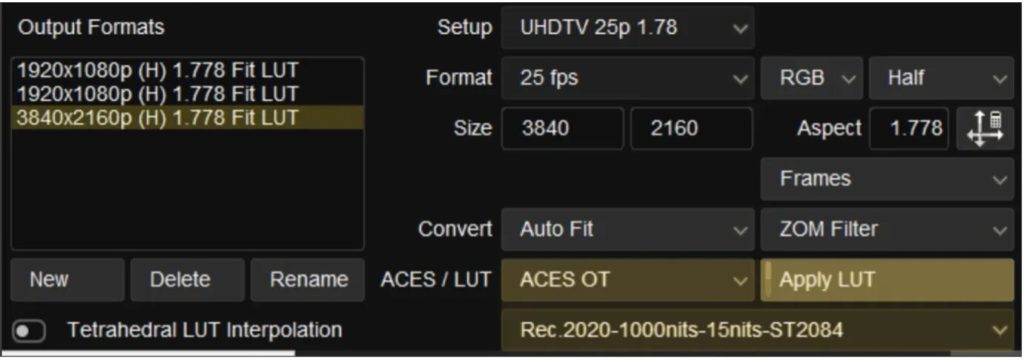
- Select the output format
- Select ACES OT
- Select an Output Display Transform (ODT) suitable for your display device
- Apply the ODT (Apply LUT button)
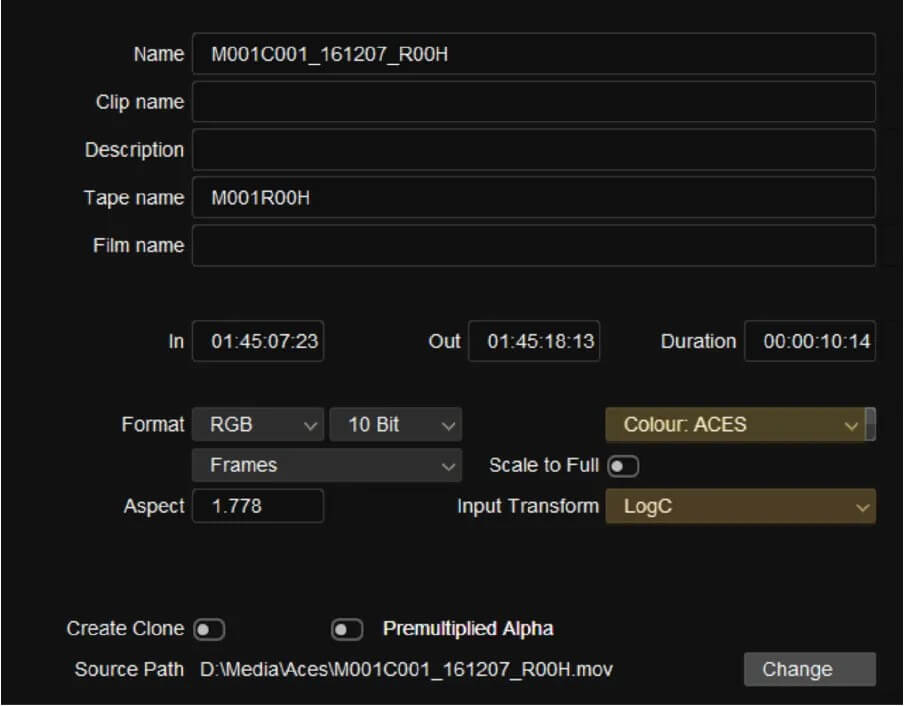
- Import your media
- Grade using your chosen ODT
- Add the correct Input Display Transform (IDT) to your clips using the properties menu (note: Remember that the properties tab applies to the clips in the media browser, not the clip currently selected in the timeline)
- You should find this workflow particularly useful for working with projects using multiple differing cameras or sources (such as archive)
Multiple delivery formats using ACES
A common delivery requirement is to deliver a copy of the show in HD, P3 theatrical, and HDR. These are the typical steps required for this.
- Output 1 (Rec709 HD)
- Output 2 (P3 HD)
- Output 3 (UHD HDR Rec709 2020 PQ)
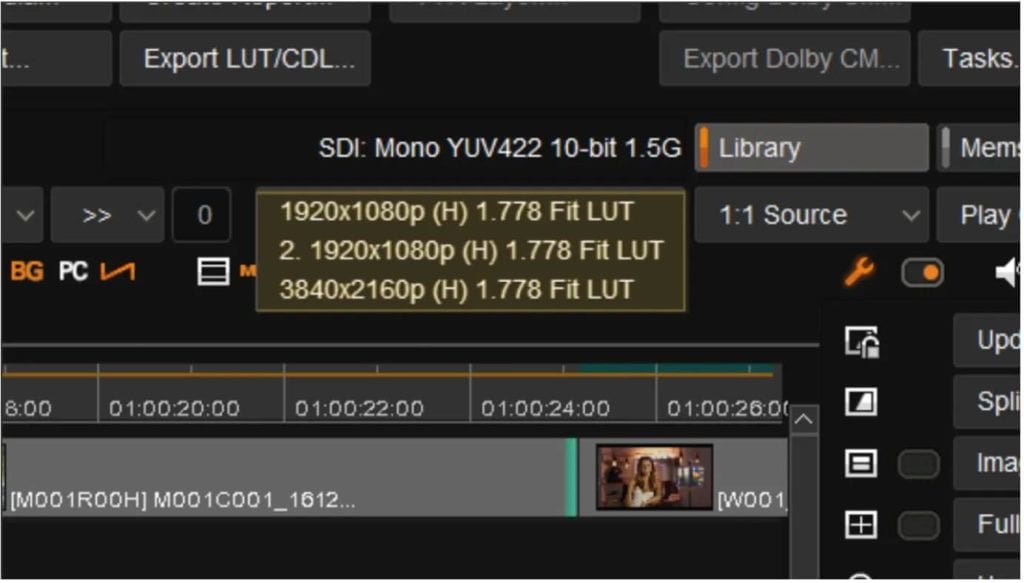
- Select your output format from the output tab
Possible output workflows
- Grade using your Rec709 ODT; save the timeline and label it as Rec709
- Duplicate the 709 timeline and rename it as P3
- Switch to your P3 ODT and do a trip pass (note: this shouldn’t require too much work if you’re lucky)
- Save your timeline
- Duplicate your timeline and rename it as HDR
- Switch to your HDR ODT and do a trim pass using the brightness regions control to control the HDR part of the signal
- Save your timeline
- Output your various deliverables
Saving the ACES 2065 data for archive purposes
It’s a requirement for some deliverables to supply the ACES 2065 data
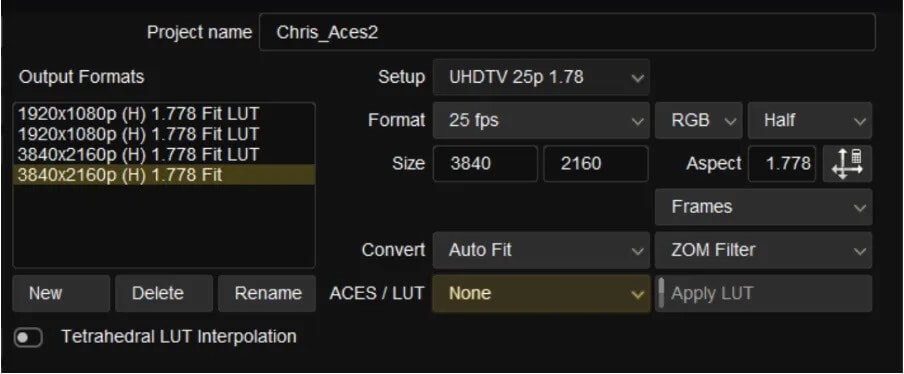
- Create an output at your chosen archival resolution (note: here we have chosen to archive at the project’s full UHD resolution)
- Remove the ACES output transform
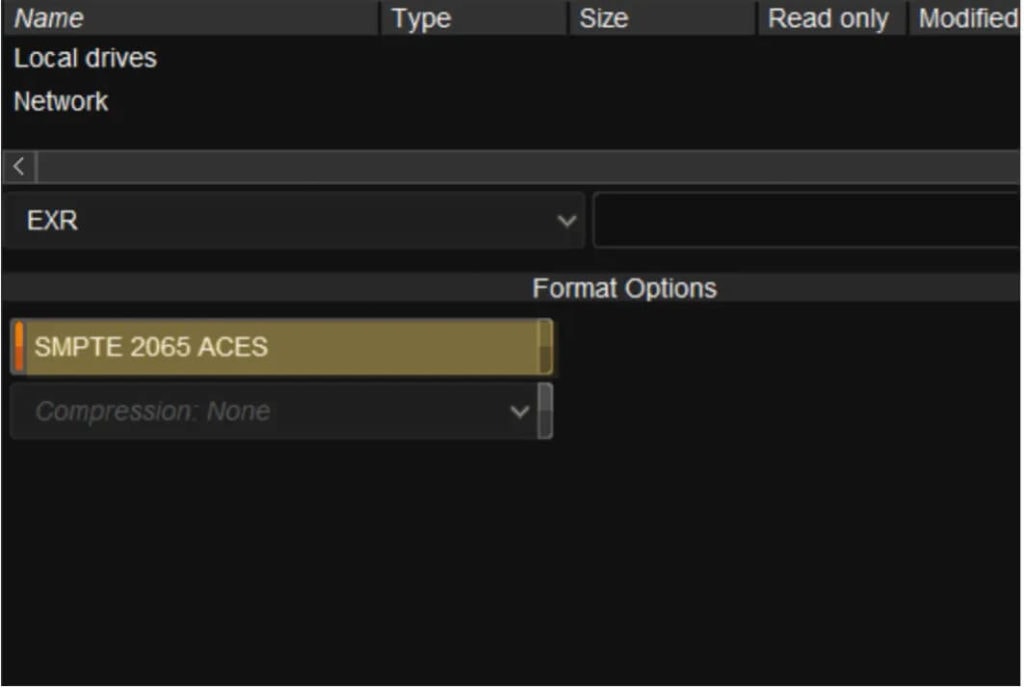
- Go to the Export Media tab
- Select EXR
- Enable the SMPTE 2065 ACES tab
- Select your chosen export directory
- Export your ACES data
For further support, check out our user forum (link)
